Intro
Printing uses more than one type of black ink, so you'll need to make a few extra considerations when creating your designs.
Run through this quick guide before you start to familiarise yourself with the different options and how to set them up.
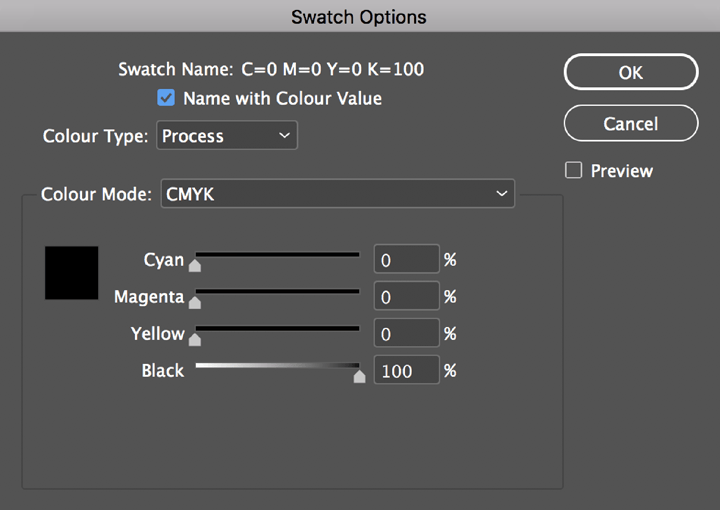
Flat Black
Print that uses a lot of text or fine detail should be done in flat black. This is because it has an ink value of 100% and eliminates any alignment issues that can give print a fuzzy look (See fig 1.1).
Fig 1.1
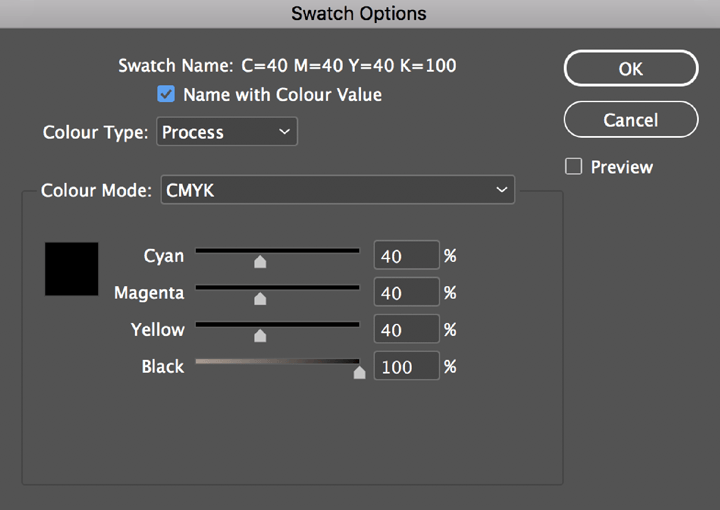
Rich Black
For print that needs a large area of black, like a background, rich black is the best kind to use.
By adding cyan, magenta and yellow underneath the black ink, we can give it a much deeper tone.
We set Rich Black as C=40 M=40 Y=40 K=100 but this can change depending on the paper stock being used. (See fig 2.1).
Fig 2.1
Registration Black
Registration black is only ever used on bleed, crop and registration marks*. It is made up of 100% of all four channels.
If you need to manually add any fold marks into the bleed area, we'd recommend doing it in registration black so that it matches the crop marks.
Note:
Most graphic editing software automatically applies registration black to any bleed, crop and registration marks you apply. (See fig 3.1).
Fig 3.1

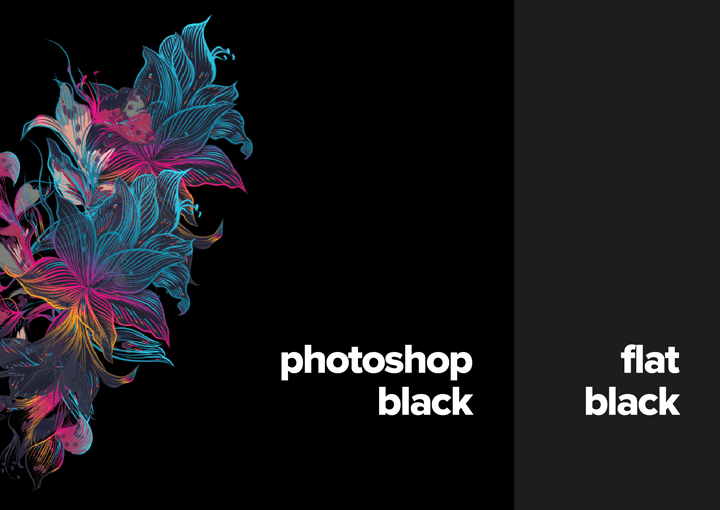
Photoshop Black
The default black setting in Photoshop is:
C=75 M=68 Y=67 K=90.
This is only occasionally used as an alternative to rich black and is hardly ever used in print.
Dropping a Photoshop black image onto a flat black background can look unsightly, so we'd advise changing the default value to flat black or rich black (See fig 4.1).
Fig 4.1
Ink Coverage
Once you've made your PDF, check the ink coverage in your document using the Output Preview tool in Adobe Acrobat.
Select the Total Area Coverage and hover the cursor over the desired area of your artwork.
Try to keep the ink coverage below 280% so there are no issues with ink drying on the press. (See fig 5.1).
Photographs can sometimes have high ink coverage, especially in dark areas, but you can adjust them in the Levels dialogue box in Photoshop (See fig 5.2).
Fig 5.1
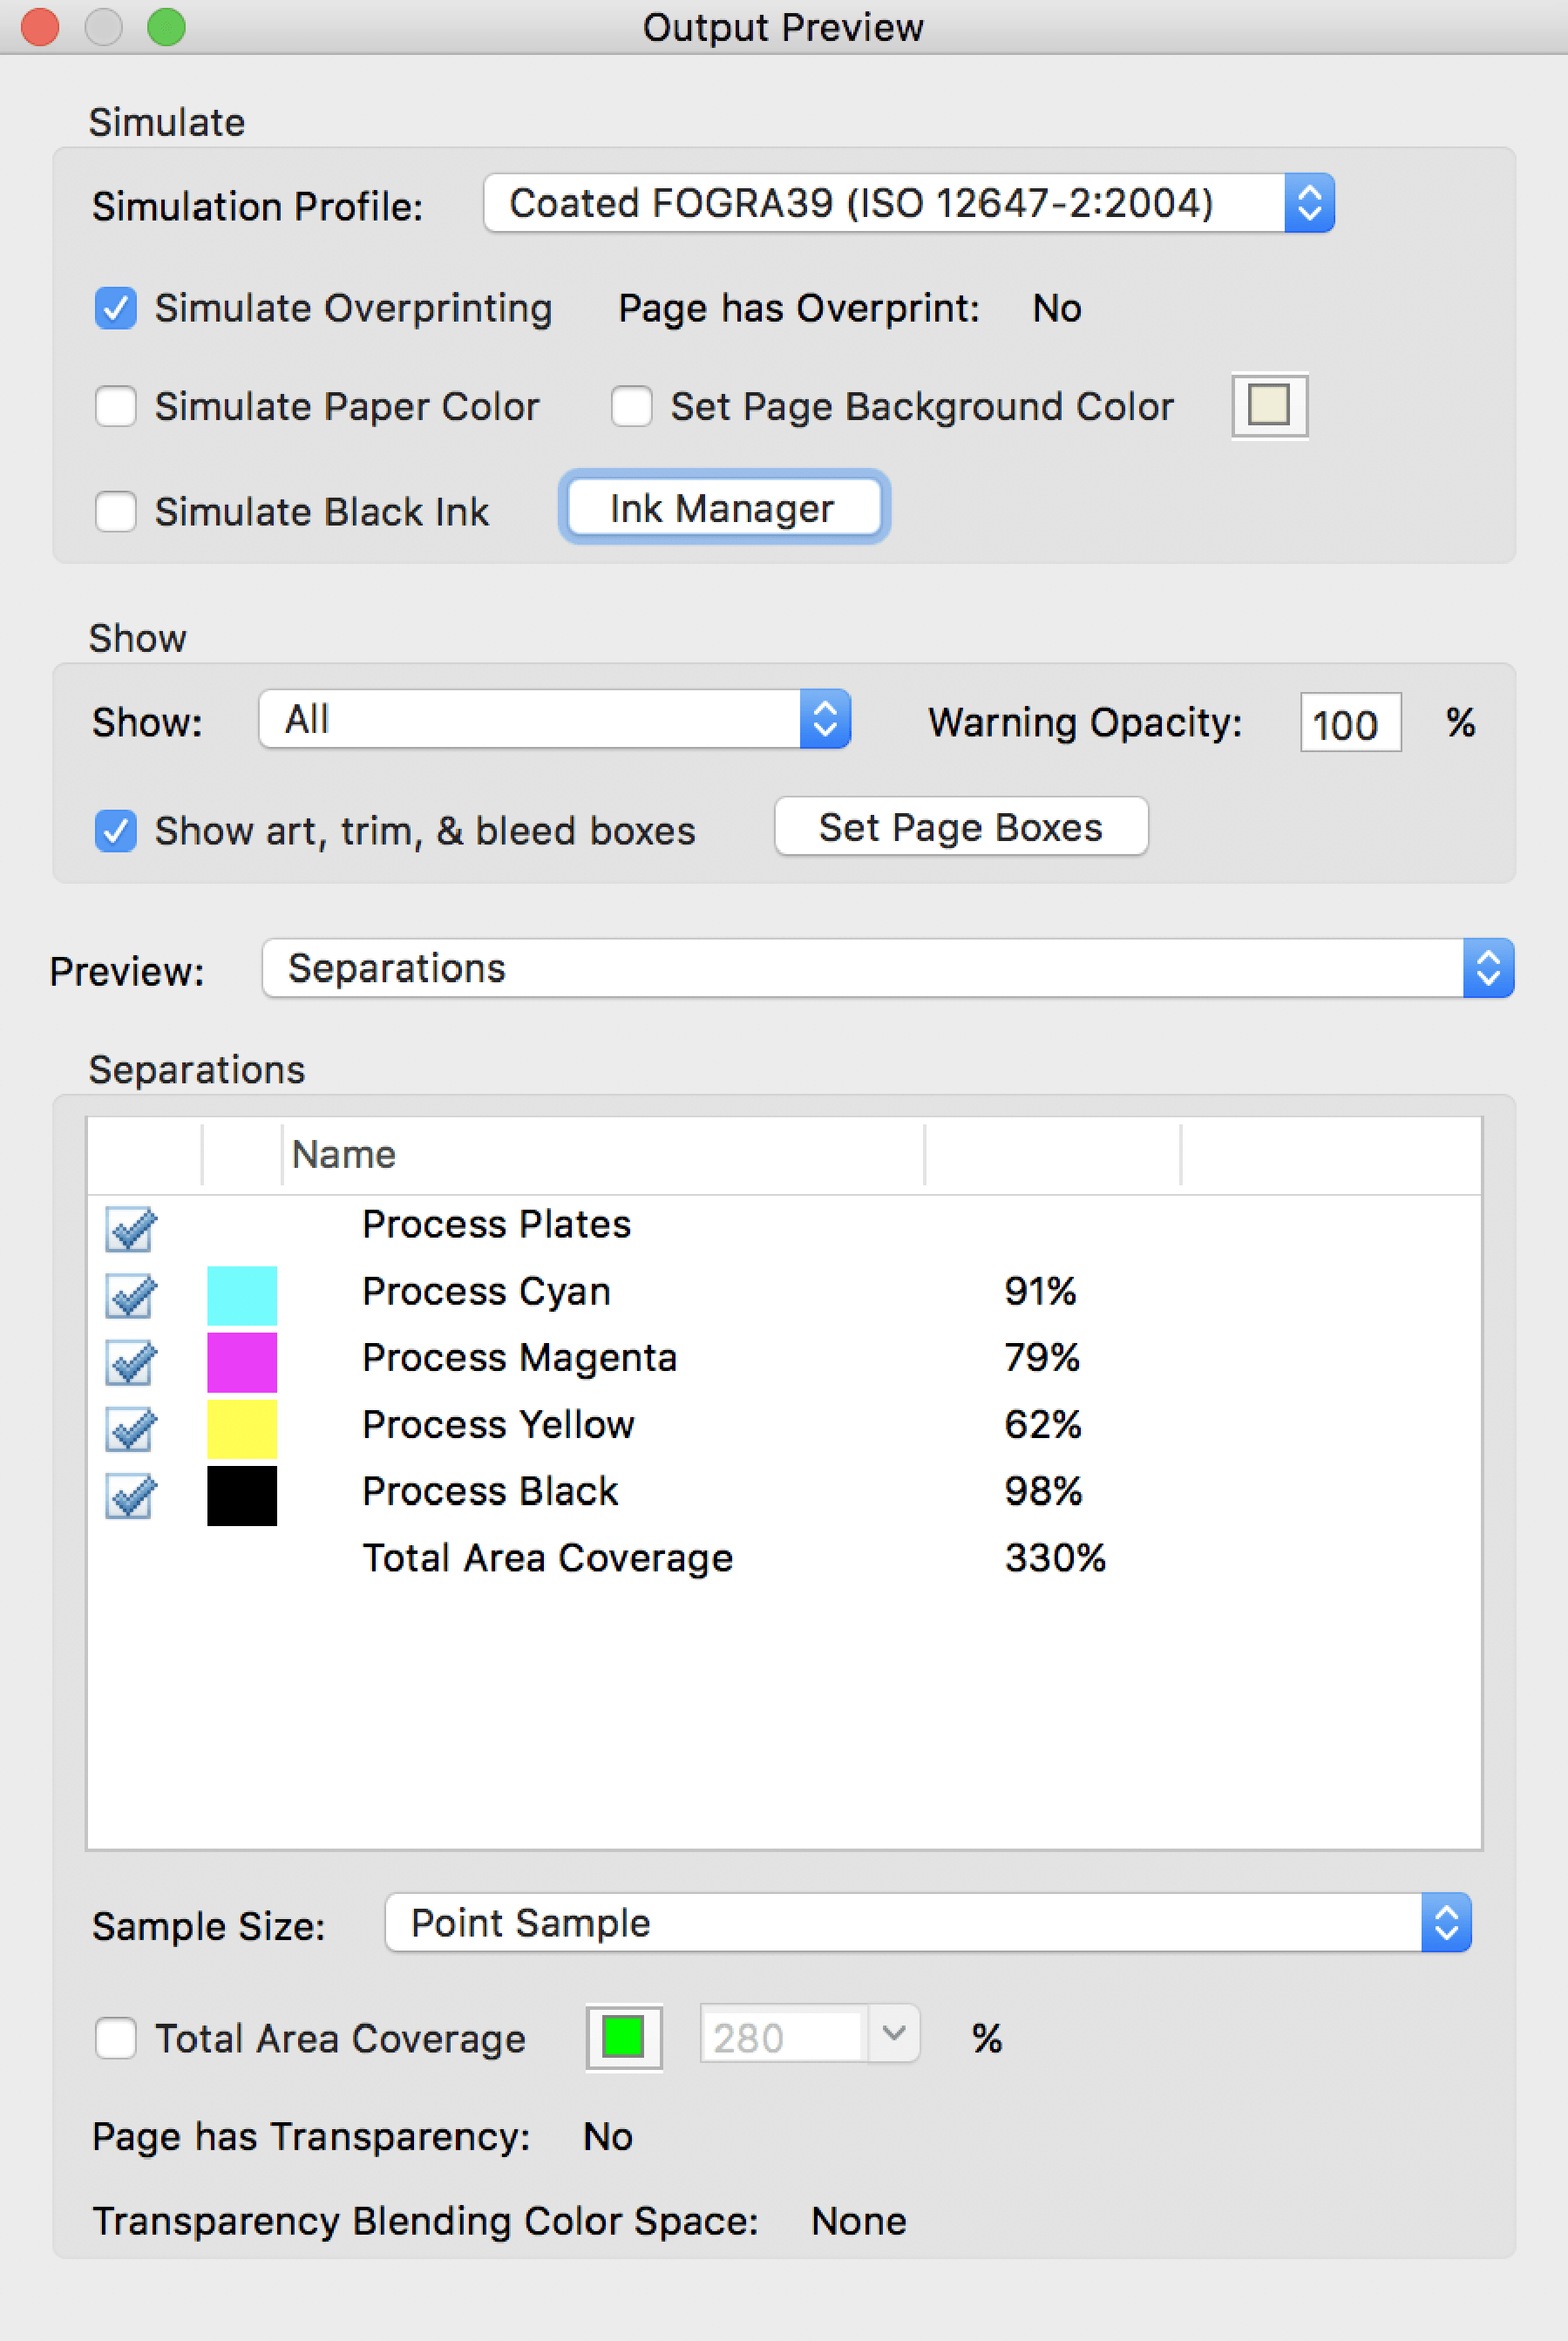
Fig 5.2
